Steps Involved in Water Heater Replacement
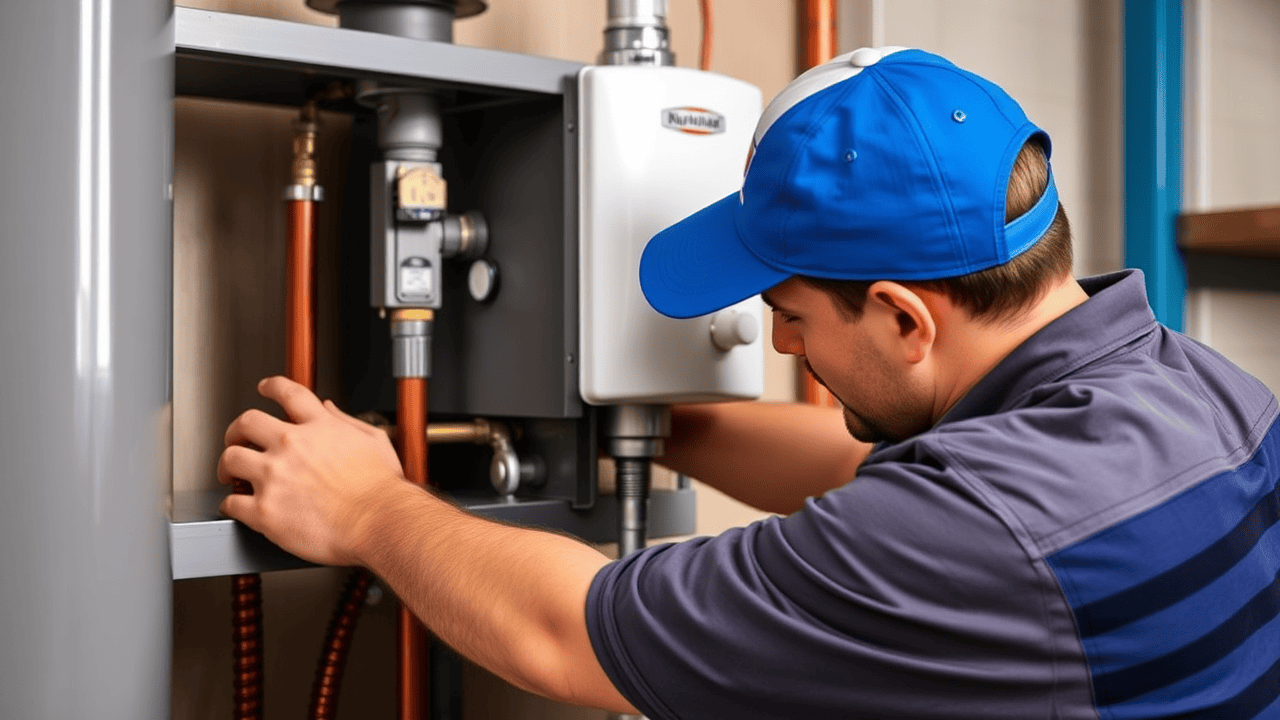
Replacing a home water heater typically begins with gathering the necessary tools and materials. Before starting, it is essential to turn off the power supply for electric heaters or shut off the gas valve for gas-powered models. Draining the old water heater is next, which involves disconnecting the inlet and outlet pipes. Properly disposing of the old unit forms an important part of the process. Water heater installation and repair in compliance with local regulations ensures that the new heater meets safety standards.
With the old unit removed, the new water heater is positioned in place. Connections for water lines, gas, and power must be made carefully to prevent leaks and ensure safe operation. After all connections are secure, the unit is filled with water, and power is restored. Testing for leaks and checking that the thermostat and safety features function properly are critical final steps. Water heater installation and repair in this phase ensures homeowners can enjoy reliable hot water without any unexpected issues.
A Detailed Overview of the Process
Replacing a home water heater involves several key steps that ensure efficiency and safety throughout the process. Homeowners typically start by turning off the power supply to the unit, which is essential for electric heaters. If it’s a gas heater, the gas line needs to be shut off as well. Next, connections to the old heater, including water lines and exhaust pipes, must be carefully disconnected. Proper drainage of the old unit is crucial to minimize water spillage. Once the old heater is removed, the new unit can be installed, connecting all necessary pipes and securing electrical or gas lines.
Water heater installation and repair in a home relies heavily on accurate measurements and secure fittings. After positioning the new water heater, it’s important to ensure that all connections are tight to prevent leaks. Next, it is time to fill the tank with water and check for any signs of issues before restoring power or lighting the pilot light for gas models. Conducting a thorough inspection of the installation gives homeowners peace of mind that their new system will function effectively.
Safety Considerations
When undertaking water heater installation and repair in your home, it's crucial to prioritize safety. Begin by ensuring you have the right tools and protective gear. Turn off the power supply to the water heater, especially if it’s electric, or shut off the gas line if you are working with a gas unit. Additionally, proper ventilation is essential, particularly when dealing with gas water heaters, to prevent the buildup of harmful gases.
Another vital aspect of safety is the drainage of the old water heater. Ensure you have a proper drain pan in place to avoid flooding or spills. It’s also advisable to have a helper assist during the removal and installation process. This extra pair of hands can be beneficial when maneuvering heavy equipment. Being aware of your surroundings and keeping children and pets away can further enhance the safety of the operation.
Ensuring a Secure Replacement Environment
Creating a secure environment is crucial when undertaking water heater installation and repair in your home. Clear the area around the existing unit to provide unobstructed access. Remove any flammable materials, tools, or obstacles that may present a safety hazard during the process. Ensure that the water supply is turned off and the power source is disconnected, whether it's gas or electric. Wearing safety gear like gloves and goggles can prevent injuries from sharp edges or accidental spills.
Ventilation also plays a critical role in ensuring safety during replacement. Open windows and doors to allow fresh air to circulate, especially if using gas heaters that produce exhaust fumes. Using a carbon monoxide detector can provide an additional layer of safety. Familiarize yourself with the local building codes and manufacturer instructions to ensure compliance throughout the installation. Properly securing fittings and connections during this phase is essential for preventing leaks and potential damage to the surrounding area.
PostInstallation Considerations
After completing the installation, it’s essential to conduct thorough tests to ensure the system functions correctly. Start by checking all connections for leaks and ensuring that the temperature settings are appropriate. Run hot water from several faucets to confirm that the heater is delivering hot water efficiently throughout the home. Regular monitoring for the first few days can help identify any potential issues early on.
For homeowners who may need future assistance, it’s helpful to remember that water heater installation and repair in your area can provide invaluable support. Scheduling routine maintenance can prolong the lifespan of the unit and help prevent unexpected breakdowns. Educating yourself on the unit’s features and operational requirements will also contribute to better performance and satisfaction over time.
Testing and Final Adjustments
After the installation of a new water heater, testing the system is crucial to ensure everything functions correctly. Start by checking for any leaks around the connections and the unit itself. Turn on the power or pilot light according to the manufacturer's instructions. Allow the heater to run for a short period to verify that it heats water to the desired temperature. Monitoring the unit during this time can help spot any immediate issues before they become more significant problems.
Final adjustments may include setting the temperature on the thermostat to a safe level, typically around 120 degrees Fahrenheit. This temperature minimizes the risk of scalding while ensuring an adequate supply of hot water. It is wise to conduct a final inspection to ensure all components are securely in place. When considering water heater installation and repair in any home, attention to detail during this phase can contribute significantly to the longevity and efficiency of the system.
FAQS
How long does it typically take to replace a home water heater?
The process usually takes between 2 to 4 hours, depending on the type of water heater being installed and the complexity of the replacement.
What factors can affect the time it takes to replace a water heater?
Factors include the type of water heater (tank vs. tankless), plumbing modifications required, the condition of existing connections, and whether any permits or inspections are necessary.
Can I replace my water heater myself to save time?
While some homeowners may choose to replace their water heater themselves, it’s recommended to hire a professional to ensure safety, proper installation, and compliance with local codes, which can ultimately save time and prevent costly mistakes.
What safety precautions should I take during water heater replacement?
Always turn off the power and water supply to the heater, wear appropriate safety gear, and ensure proper ventilation if you are working with gas appliances.
Are there any post-installation steps I should be aware of?
Yes, after installation, it’s important to test the water heater for leaks, check the temperature settings, and ensure that all connections are secure before using the appliance.